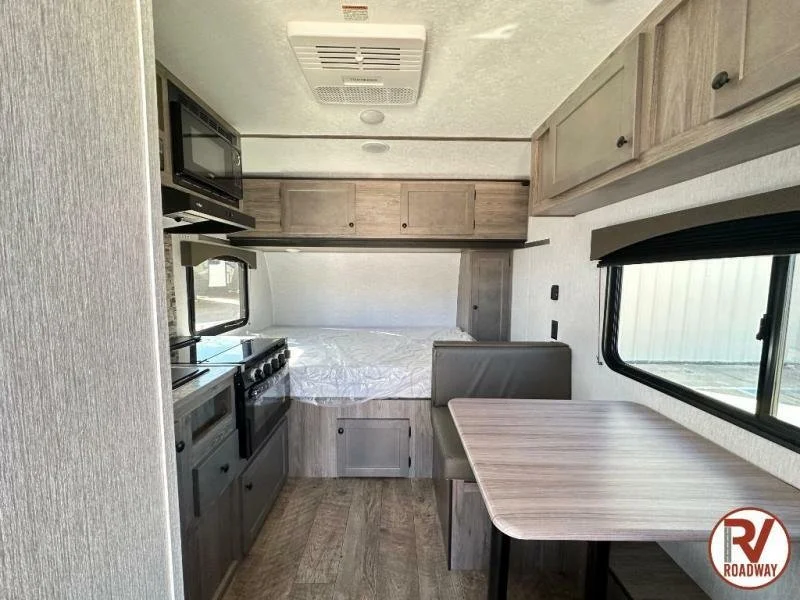
When I first bought my trailer, she was pretty bland. Warm grey faux wood everything. That had to change! I mean, just look at this blank slate… We can do better.
The first thing I did was add some colorful peel and stick tile to the bathroom and a cute, color coordinated shower curtain. I also added some baskets to the wall to hold toiletries and things. The baskets made a huge impact. I’m not sure where else my shampoo and conditioner and makeup and toilet paper would live!
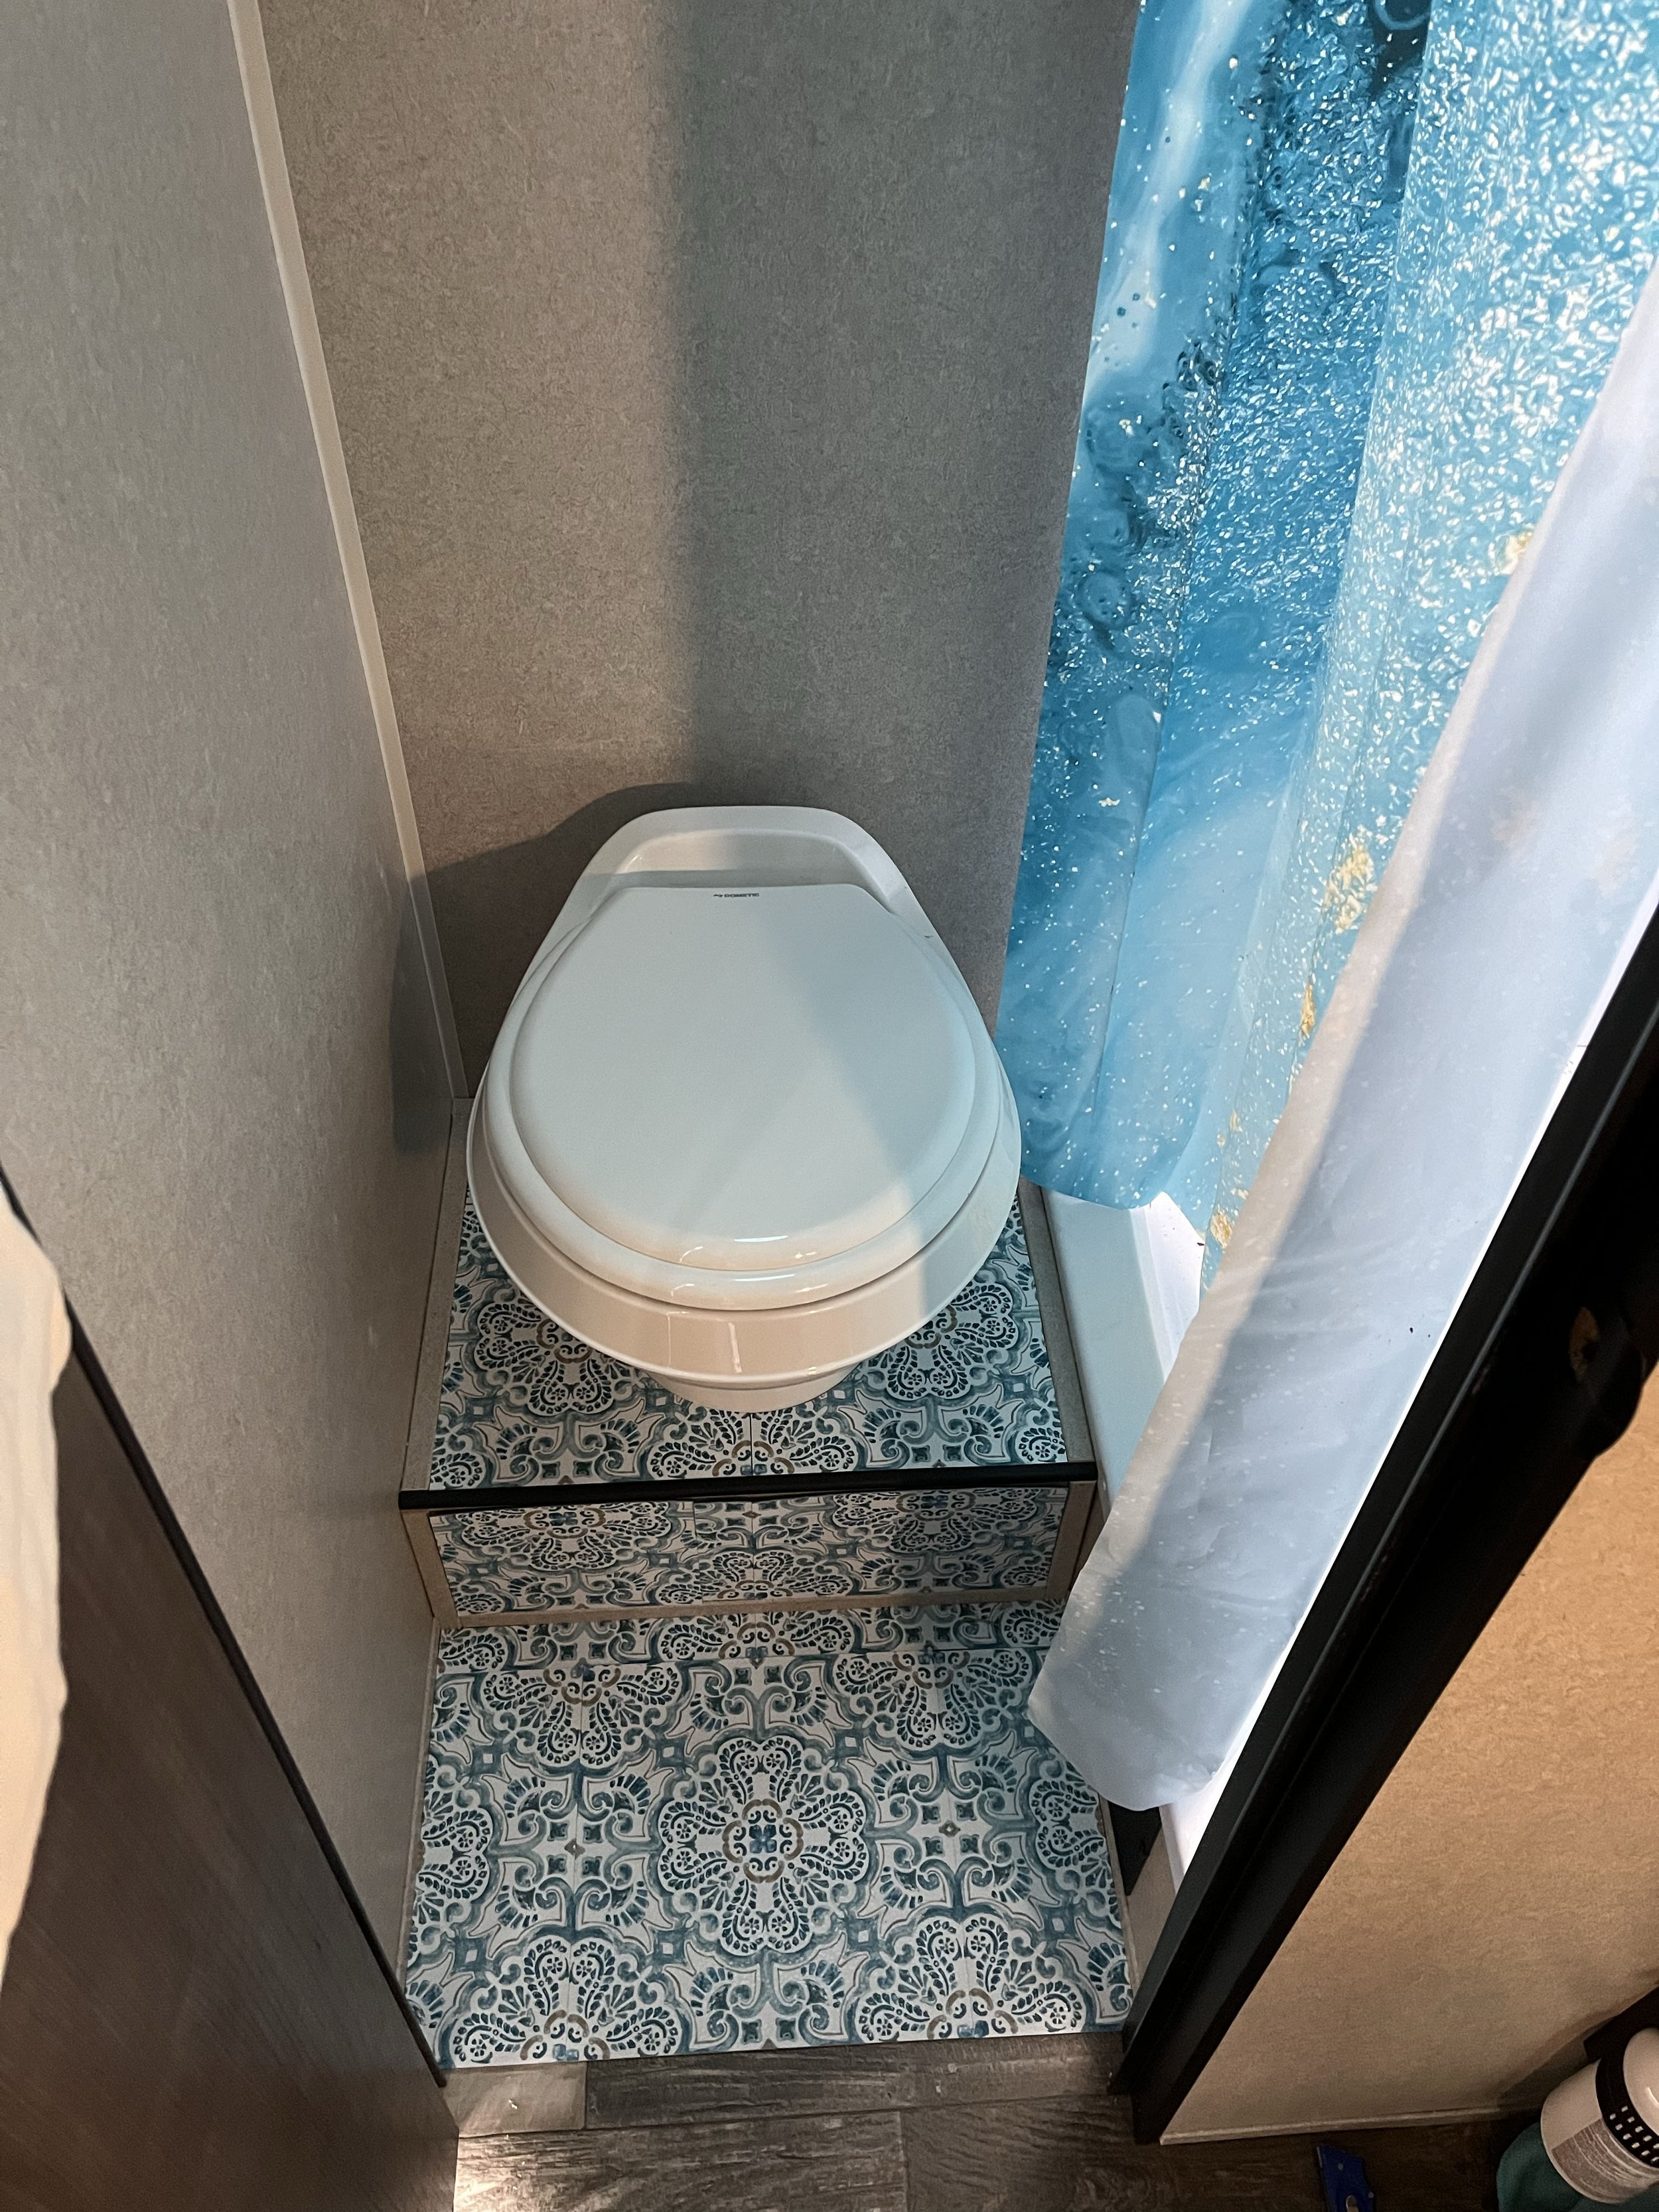

Shop the wire baskets and toilet paper holder for my travel trailer bathroom on Amazon. In the pictures they are hanging on hooks, but ended up just screwing them into the wall anyway, and that’s what I’d recommend.
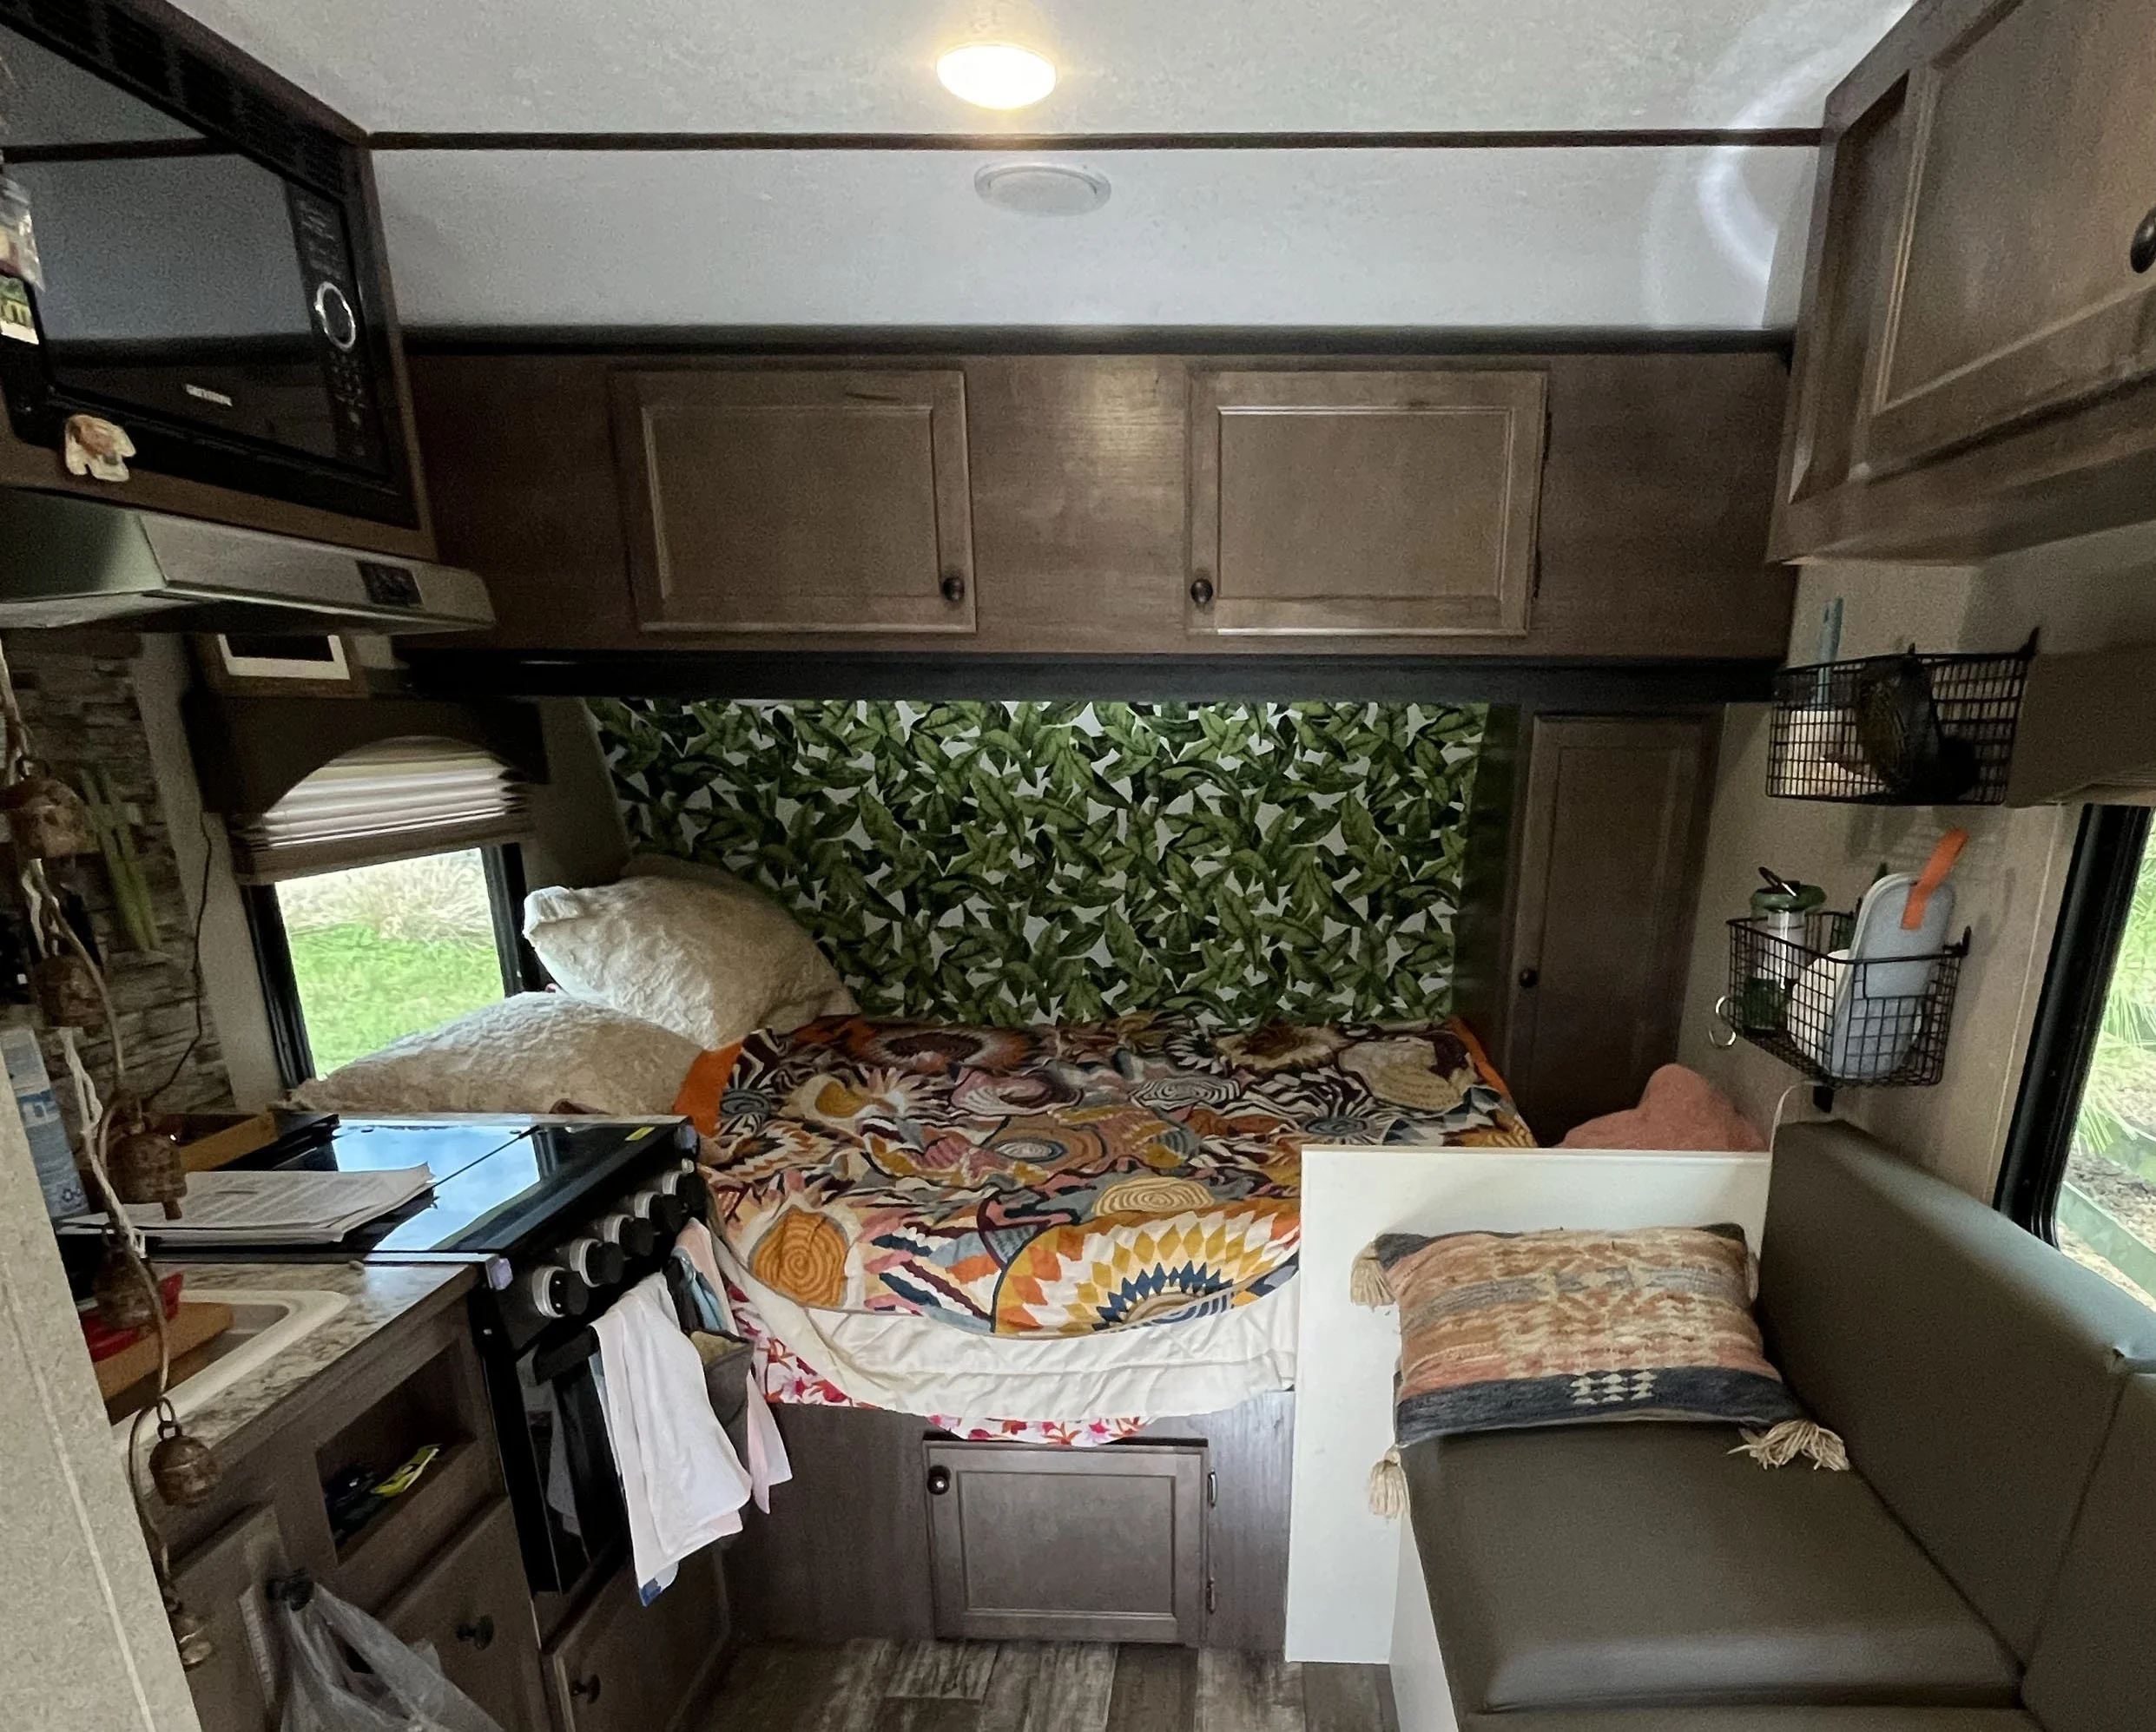
Next up, I needed my bed to be way more comfy cozy. I added this fun botanical leaf wallpaper from Walmart and this bright blanket. Some more baskets near the bed make storing electronics and knickknacks much easier. I added baskets on the kitchen wall too, along with some hooks near the entry. It makes a world of difference to have all these little pieces added in to control the clutter.
I added baskets on the kitchen wall too, along with some hooks near the entry. It makes a world of difference to have all these little pieces added in to control the clutter.
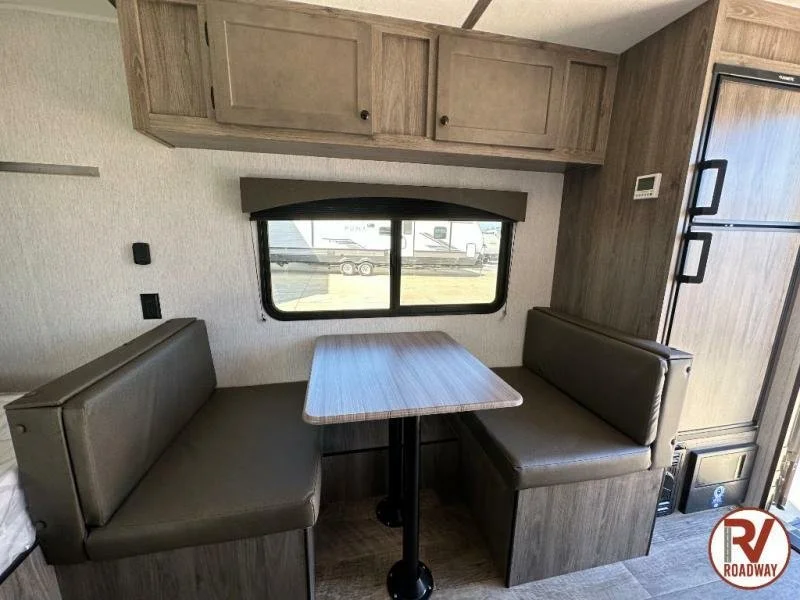
You’ll notice in the photo above, my seating area is different from my before photos. After traveling in my trailer for a month, I realized I needed more floor space and a little bit more storage. I figured I could rotate the benches to face in and gain the floor space I needed. Recruiting my boyfriend to help, we did exactly that! And it was a GAME CHANGER.
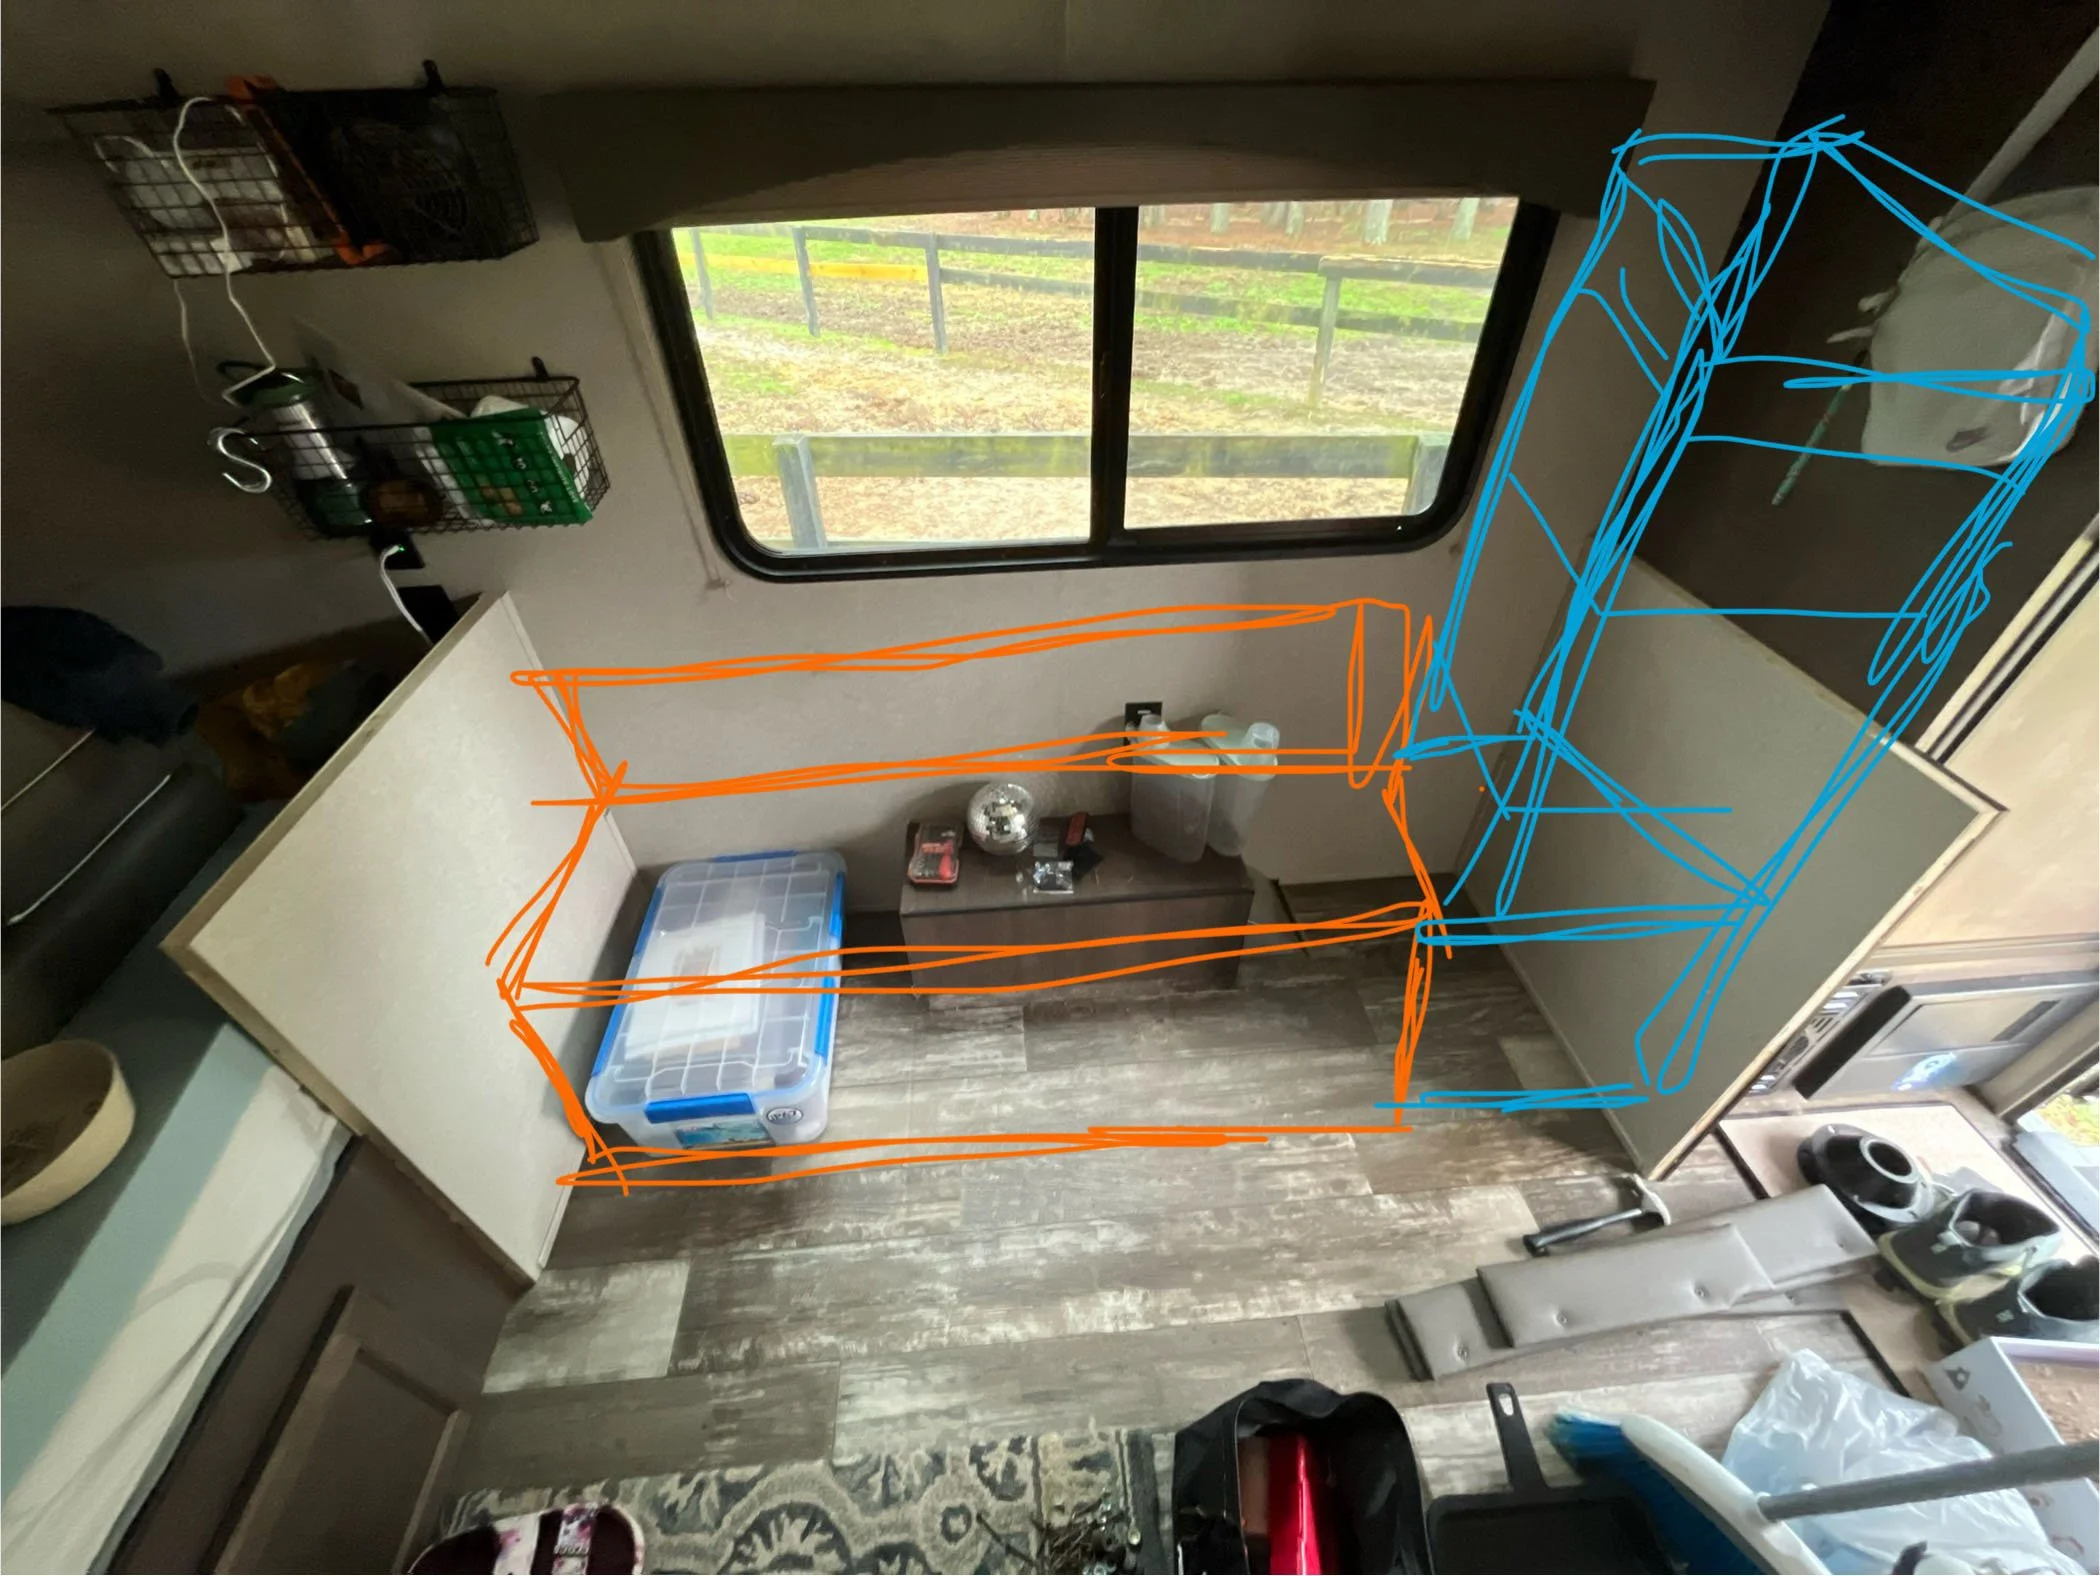
Six inches might not seem like much, but I can assure you, it is! In this orientation, I now have I access to the dog food bin on the right without needing to move the cushions. Huge. Later on, we added a movable table piece. I imagined finishing my novel here. I did not.

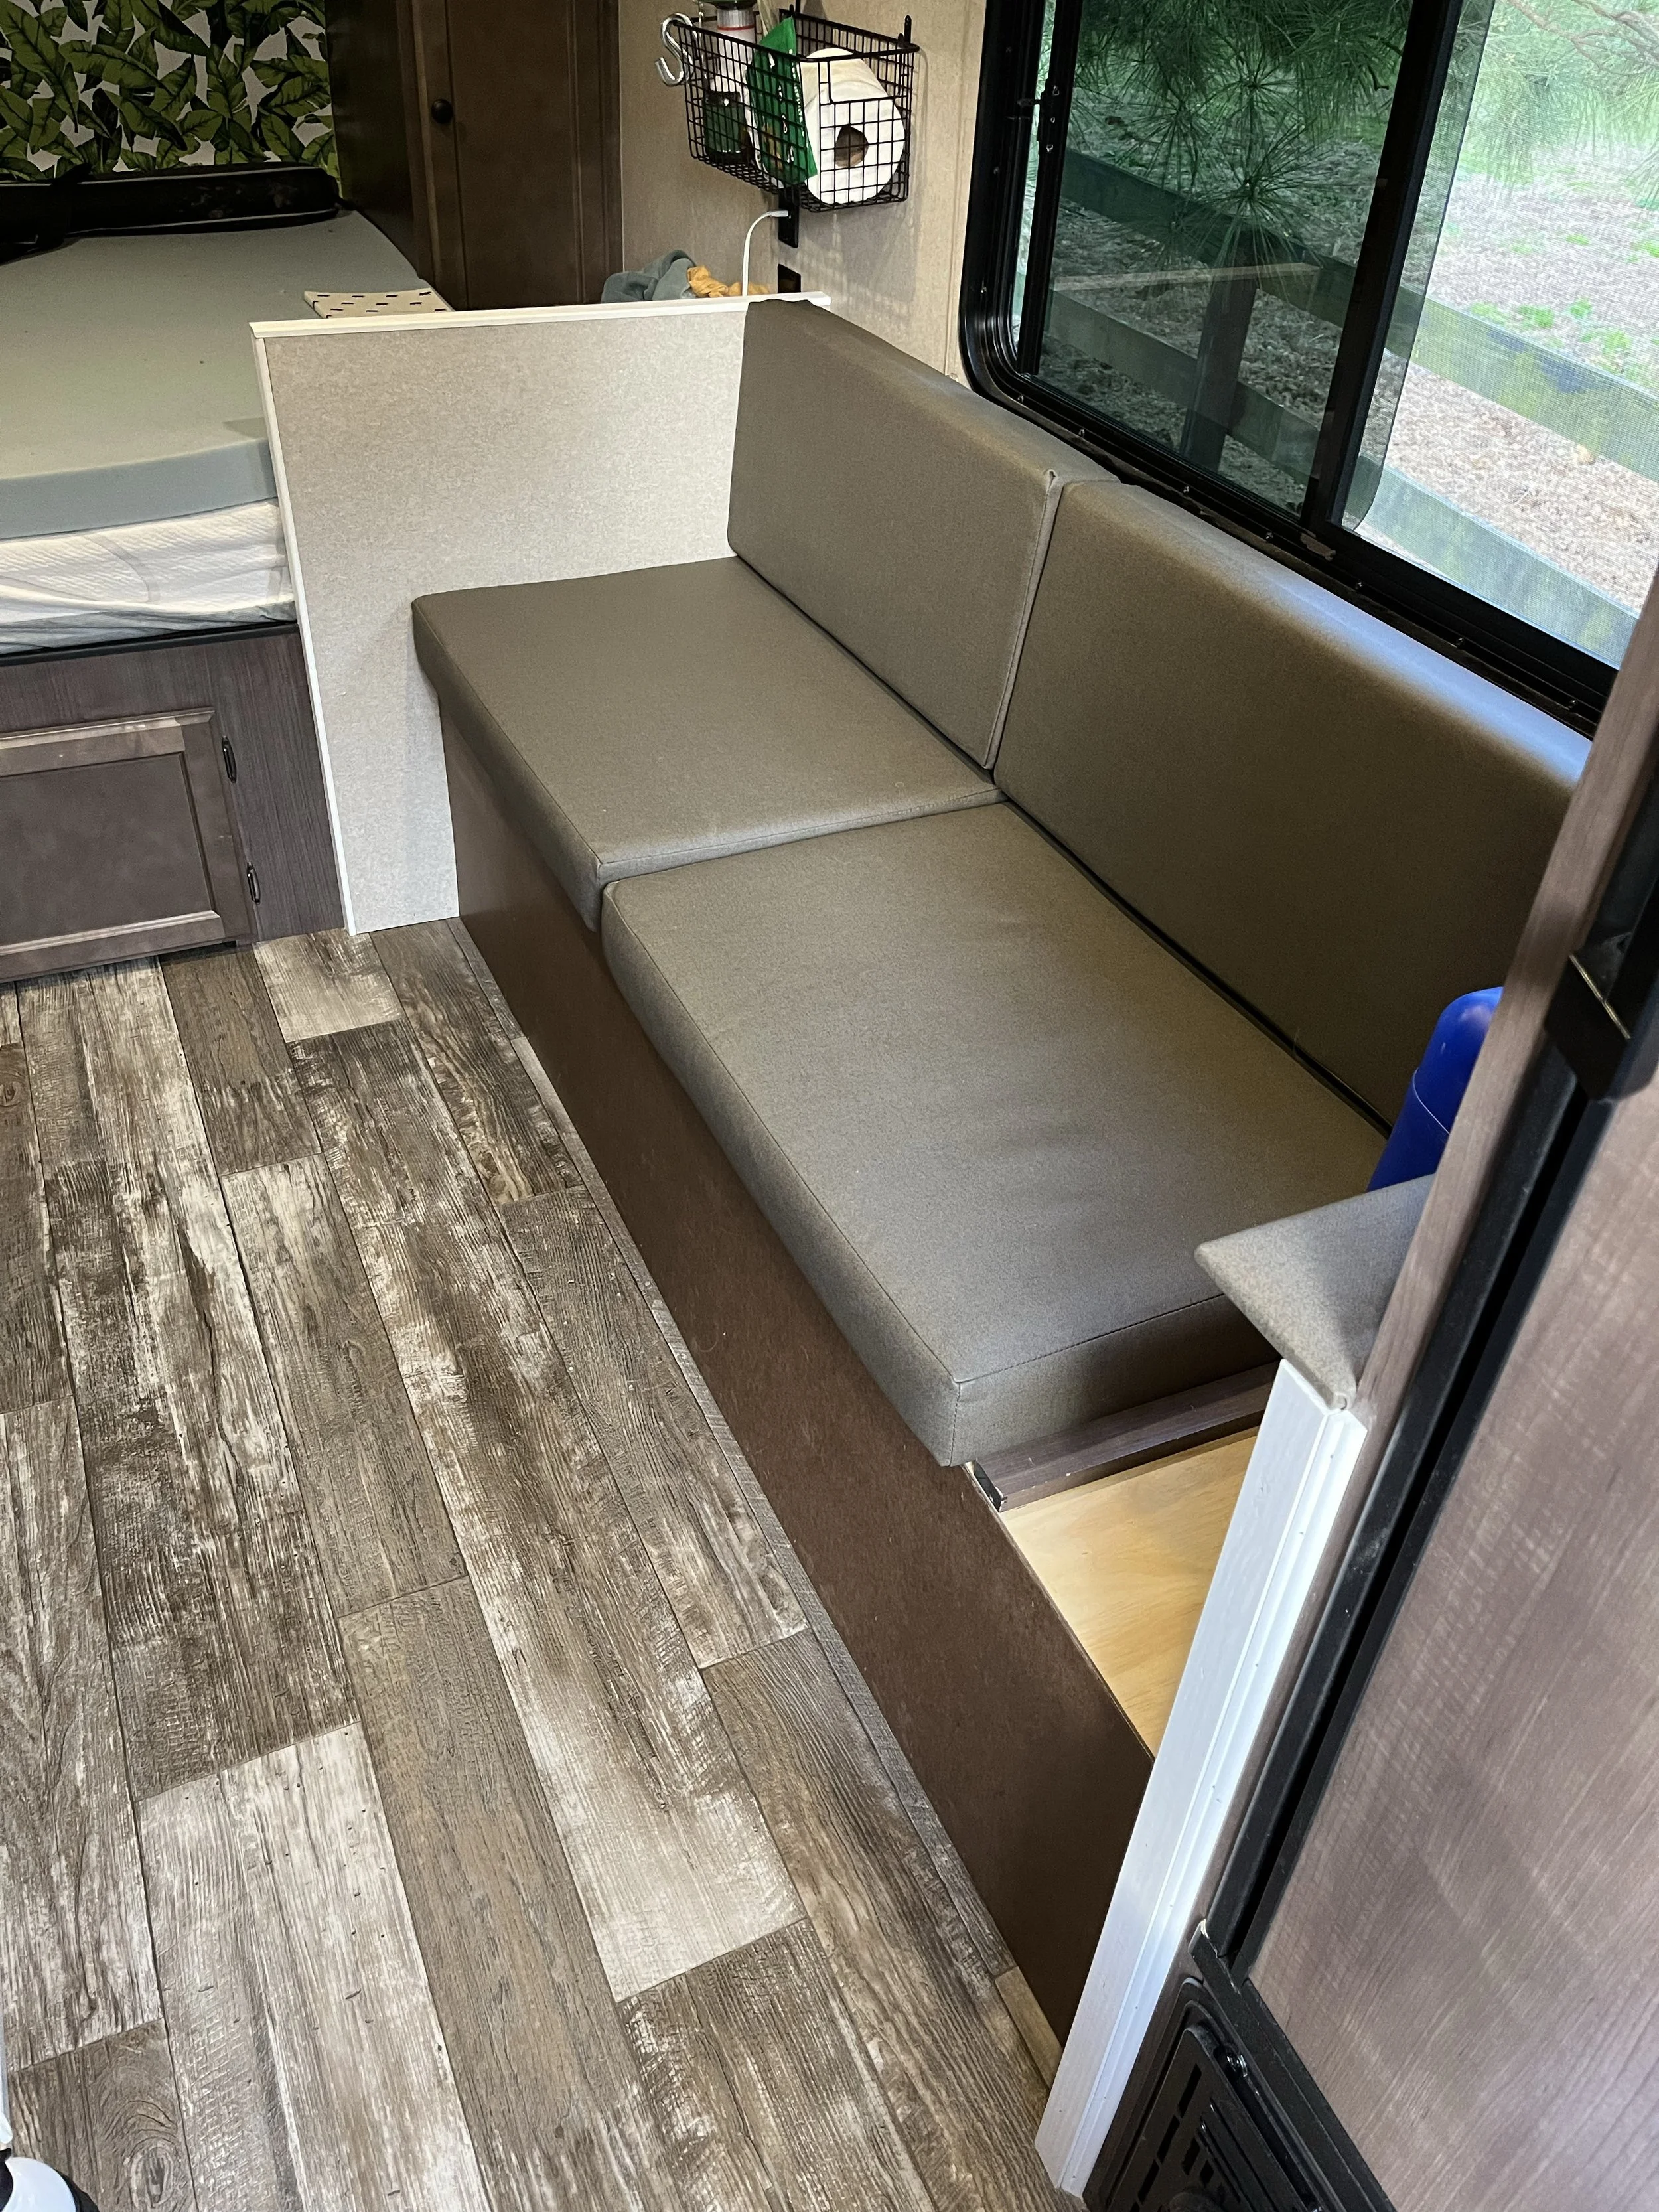
Recently I decided I wanted to recover the cushions on the bench. I had some fabric from some other unstarted project and it worked well with the color scheme starting to develop. I added additional foam, cut the width of the cushions down as well, and it’s way more comfy than the original vinyl.

In the picture above, you can see the backsplash in the kitchen. It was a faux stone and just not well done. Peel and stick tile to the rescue! I got this adorable leaf pattern in a light aqua blue and went to town. I used 2 boxes for this space, there were a lot of cuts because of the window and the magnetic knife holder. I did remove the valance and blinds to attach the tile. And I caulked in between the sheets and all the seams around the entire backsplash for a more finished look.
For the valance, I wanted to replace the vinyl with something lighter and brighter and picked up this basket weave cream fabric from Hobby Lobby. I also trimmed off the curved part, which I’m not sure I love. My plan is to do the rest of the valances as well.

You can also see the other baskets I have in the kitchen here and the paper towel holder. Super clutch for such a small space.
Some other pieces I also have in my trailer that I love are this macrame laundry bag and some plastic storage containers for the cabinets.


Next on my list: fixing the water damage from what appears to be the world’s smallest leak at the front of the trailer! And then, I think I’m going to put beadboard on the fridge… TBD!
Stay tuned for more updates and things I’ve loved while traveling in my tiny tiny trailer!